Timothy Chrystal Neil’s Military History

Introduction

In this page I outline what I have discovered about Timothy Chrystal Neil’s military service during the Great War of 1914-18, the campaigns he would have been involved in, the intersection between war and his family life as far as I know it, and his demobilisation and return to civilian life. At the end of this I detail the documentary evidence on which my conclusion are based.

After this outline, I have listed the sources I have used and have also added a more detailed list of the activities of the Royal Inniskilling Fusiliers and their campaigns both in Gallipoli and the Western Front.

Timothy Chrystal Neil Before the War

At the taking of the 1901 Census, Timothy Chrystal Neil was living at 21 Salisbury Street, Gorbals Glasgow ; he was aged 10 and a scholar. I have not found him in the 1911 Census yet but he was presumably a young man growing up in an industrial city that, as war approached, provided large numbers of recruits to the British Army during the First World War. Like many young Scottish men, Timothy ultimately entered military service during the conflict, joining the Royal Inniskilling Fusiliers, an Irish line regiment which drew recruits from across the United Kingdom. By July 1917, Timothy is recorded as a Private, 1st Battalion, Royal Inniskilling Fusiliers, and noted as being on active service at the time of his marriage. This confirms that he was serving with a front‑line infantry battalion of the British Expeditionary Force (BEF) during the most intense period of the war.

Why the Royal Inniskilling Fusiliers?

On the face of it, it may seem odd that he joined an “Irish” regiment but, in fact, it was one of the most natural choices for a Catholic man in Glasgow. Although officially a line regiment of the British Army, the Royal Inniskilling Fusiliers were historically Irish being strongly associated with Ulster Catholics, especially those from County Fermanagh and County Donegal. The regiment was perceived (including by recruiters) as a Catholic-friendly Irish regiment and that mattered a great deal in 1914–1916. This isn’t really the place to go into any detail about Ireland and the Great War, suffice it to say that Ireland was a nation divided by World War I and its own political future. The period saw both Irishmen fighting and dying for Britain (as at the Somme), and secret societies like the Irish Republican Brotherhood seizing the moment to strike for a republic (the Easter Rising of 1916). So, for reasons of religion and nationalism, the choice of regiment was important.

The sectarianism so powerful in Ireland, also manifested itself in important ways in Glasgow. It might seem natural for Timothy to join a Scottish regiment but for many Catholic men in Glasgow, some Scottish regiments were seen as culturally Presbyterian and socially unwelcoming. Also, some of the “Irish” regiments of the British Army, The Royal Irish Rifles and Royal Irish Fusiliers had stronger Protestant/Unionist associations. On the other hand, The Royal Inniskilling Fusiliers were regarded as less sectarian, more Catholic in composition and safer socially for Catholic recruits. The regiment maintained an active recruiting drive in Scotland and, although they deliberately sought out Irish Catholic men, many recruits were not Irish at all and did not need to be. Additionally, the regiment recruited heavily in Glasgow and Lanarkshire, Ayrshire and the West of Scotland industrial towns

Of course, TImothy was born in Glasgow so was not Irish himself and neither were his parents but he still had some Irish connections – his grandmother was born in Ireland and two of his three older sisters married Irishmen; his own middle name, Chrystal, came from his mother’s maiden name, her parents both being Irish. No doubt, also, many of his friends and workmates would either be Irish or of Irish descent. A young Catholic man’s desire for identity, belonging and respect could be well met with this choice of regiment; the Inniskillings were already heavily engaged (Gallipoli), prestigious and perceived as a “fighting regiment”. Despite not being Irish himself, for a Catholic Glaswegian, the choice of The Royal Inniskilling Fusiliers was a sensible choice. In fact, more likely rather than unlikely.

Timothy’s Military Service Record

A service record for Timothy would answer a lot of questions about his life during the war but I have not been able to find a service record for him. This is not unusual; approximately 60% of British Army service records from the First World War were destroyed during German bombing in the Second World War, when the War Office repository at Arnside Street, London, was hit during the Blitz in 1940. The remaining records are often referred to as the “burnt documents.”

Soldiers of Timothy’s type — rank-and-file infantrymen without gallantry awards or long pre-war service — are disproportionately represented among the missing files. In such cases, family historians must reconstruct service using secondary evidence such as regimental numbers, medal entitlement, marriage records, hospital admissions, war diaries, and battalion histories. What follows utilises all of these sources.

When Did Timothy Enlist?

I do not know when Timothy joined the army. I have not found him in the 1911 Census, when he would have been about eighteen years old. Timothy’s absence from the 1911 Census is shared with his brother John and sister Elizabeth. His older siblings had married by then and had established households of their own, while the youngest children, Susan and Charles, were living with their parents at 6 Eglinton Lane, Gorbals, Glasgow as boarders in the household of Alex Kemp, a blacksmith.

I have no documentary record of him between the 1901 Census, where he appears as an eight-year-old scholar living at 21 Salisbury Street, Glasgow, and his marriage sixteen years later in 1917, when he is recorded as a coal salesman and a Private in the 1st Battalion, Royal Inniskilling Fusiliers on active service; either have I been able to find attestation papers for him. In the absence of surviving service papers, Timothy’s route into the army cannot be stated with certainty. However, several plausible possibilities exist.

Possibilities

Before 1916, the British Army relied entirely on voluntary enlistment, with particularly large numbers joining in 1914 and 1915 following the outbreak of war. In January 1916, compulsory service was introduced for single men aged 18 – 41, and in May 1916 this was extended to include married men. These measures marked Britain’s transition to a full “total war” footing.

Timothy, born in January 1893, was 21 years old at the outbreak of war and therefore eligible to enlist voluntarily from the beginning of the conflict. He may have enlisted as a volunteer in 1914 or 1915, or he may have entered the army following the introduction of conscription in 1916. Alternatively, he may have been posted to the 1st Royal Inniskilling Fusiliers as a reinforcement draft, a common practice as battalions were rebuilt after heavy losses. So, which of these is the most likely from the scant evidence we have.

Evidence from Regimental Number

Timothy’s regimental number with the 1st Royal Inniskilling Fusiliers was 10241. British Army number blocks were issued roughly in order, and numbers in this range typically belong to men who enlisted during the early years of the First World War, often in late 1914 through 1915. This strongly suggests that Timothy volunteered relatively early in the war, rather than being posted only after the introduction of conscription in 1916.

If he enlisted in 1914/15 he would initially have been posted to a Depot Battalion or a Reserve / Training Battalion. Only after that would he have been drafted into a fighting battalion. So it is unlikely that he was with the 1st Battalion of the Royal Inniskilling Fusiliers  when they fought during the Gallipoli Campaign of 1915. Many men who did enlist during this time did not actually reach active service until after the Gallipoli Campaign so without documentary evidence his presence at Gallipoli is unlikely.

Evidence from Service Medal Card

Some evidence comes from his medal card which says that he was awarded the British War Medal and the Victory medal. It does not list the 1914 Star or the 1914-15 Star which was only given to soldiers who had entered a theatre of war before 31 Dec 1915. Therefore it is likely that he enlisted in late 1914 or 1915 and, after training, was posted to 1st Battalion, Royal Inniskilling Fusiliers on the Western Front during 1916.

Conclusion

The 1st Battalion, Royal Inniskilling Fusiliers served throughout the war with the 29th Division, one of the British Army’s most heavily committed formations. Before Timothy’s arrival, the battalion had seen action at Gallipoli in 1915 and was already hardened by heavy fighting and accustomed to high casualty rates. At the end of the campaign, in December 1915, the regiment was evacuated from the peninsula. After a short period in Egypt, defending the Suez Canal, the battalion was transferred to the Western Front. It would seem likely that this was when Timothy joined them as part of battalion reinforcements. The regimental diaries for the Royal Inniskilling Fusiliers can give us a clear picture of what actions Timothy would have been involved in. 

1st Battalion, Royal Inniskilling Fusiliers on the Western Front

Service on the Somme and Ancre, 1916–early 1917

During 1916, the 1st Battalion fought on the Somme, including the Battle of Albert (1 July 1916) and later engagements around Guillemont and Ginchy in August and September. By the winter of 1916–1917, the battalion was holding trenches in the Somme / Ancre sector, north of the River Ancre near Beaumont‑Hamel.

Timothy’s early service would have consisted of the routine but dangerous life of a front‑line infantryman: long periods in waterlogged trenches, night patrols, wiring parties, trench raids, and constant exposure to artillery fire. The winter was particularly harsh, with snow, frostbite, and illness compounding the strain of active operations.

The German Withdrawal and Arras, spring 1917

In February–March 1917, German forces began a strategic withdrawal to the Hindenburg Line. The 1st Inniskillings advanced cautiously into abandoned enemy positions, clearing trenches, dealing with booby traps, and suffering casualties from rearguard actions. This phase of the war was dangerous and unpredictable, as the enemy deliberately left mines and delayed‑action explosives behind.

In April and May 1917, the battalion took part in the Battle of Arras, including costly fighting around Oppy Wood, a strongly defended German position. Losses were heavy, and the battalion required rebuilding once again.

Rest, Leave, and Marriage, summer 1917

By June 1917, the 1st Battalion was withdrawn to reserve areas in Flanders for rest, reorganisation, and the absorption of reinforcement drafts. The battalion was billeted in camps and villages including Proven, Herzenberg Camp, and Elverdinghe. Training resumed, but enemy contact was limited.

This period coincided with one of the rare occasions in 1917 when leave was granted on a significant scale. During this lull, Timothy Chrystal Neil returned to Glasgow, where on 16 July 1917 he married at St John’s Church, Portugal Street. The battalion war diary records this as a notably quiet period, with routine duties and church parades rather than combat.

The day after Timothy married, the first men on leave were returning to their units so, within days, Timothy would have had to return. On the 18th July the battalion made night movements to Herzenberg / canal-bank camps. Artillery activity increased daily and the final rehearsals for a large scale offensive were conducted.

Passchendaele, July–November 1917

From mid‑July 1917, the battalion undertook intensive preparation for the forthcoming offensive in the Ypres Salient, including open‑warfare training, practice assaults, and night movements to forward assembly areas. By late July, the battalion moved into positions east of the Ypres–Pilckem Road.

The Third Battle of Ypres (Passchendaele) began on 31 July 1917. Conditions rapidly deteriorated as heavy rain turned the battlefield into deep mud. The 1st Inniskillings fought in the Pilckem–Steenbeek sector and during the Battle of Langemark in August. Infantry advances were conducted through flooded shell holes under machine‑gun fire, and casualties were severe.

The “Third Battle of Ypres” – Passchendaele – was one of the most costly campaigns of the conflict. The battle took place on the Western Front, from July to November 1917, for control of the ridges south and east of the Belgian city of Ypres in West Flanders. The casualties of this battle were huge; it is estimated that there were 245,000 casualties of which 70,000 were killed. If enemy casualties are included, there were some 460,000 – 470,000 casualties. Passchendaele has become emblematic of the attritional nature of trench warfare because so many casualties were suffered for comparatively limited territorial gains.
The 29th Division, of which the 1st Royal Inniskilling Fusiliers was a part, endured heavy casualties at Passchendaele typical of front-line British infantry formations in 1917 — numbering in the thousands across the battle as a whole. Though precise published totals by division aren’t always available, surviving war-diary fragments show the 1st Inniskillings taking dozens to several hundred casualties in specific periods of the Passchendaele campaign, reflecting the intense fighting conditions in Flanders.

Possible Sickness Leave Late August / Early September 1917

At this point a question arises pertaining to the birth of Timothy’s first son, John McDonald Neil. He was born on 15 Jun 1918 and so must have been conceived around late August or early September 1917; but wasn’t Timothy with his battalion on the Western Front at this time?

If we discount the idea that Timothy wasn’t John’s father – a suggestion that we have no evidence at all for and which we have documentary evidence to to the contrary of in John’s civil birth registration, his baptismal register entry and the 1921 Census, then we have to explain how he could have been back in Glasgow just a few months after his marriage. This timing falls after the opening of the Passchendaele offensive on 31 July 1917. From that point onward, leave for front-line infantry units was severely restricted and, in many cases, suspended altogether. It would have been highly unusual for an infantry private to receive a second period of formal home leave within six to eight weeks of his marriage, particularly while his battalion was heavily engaged in sustained offensive operations.

For this reason, it is unlikely that the conception of Timothy’s first child resulted from a second grant of ordinary leave. Instead, the most defensible explanation is that Timothy was temporarily removed from front-line duty for medical reasons in late summer 1917. British Army practice during prolonged fighting frequently saw soldiers evacuated sick for conditions such as exhaustion, trench fever, gastrointestinal illness, or early manifestations of venereal disease. Such removals did not constitute leave but could involve transfer through rear areas or, in some cases, through medical facilities in the United Kingdom. During these periods, men sometimes had brief opportunities to visit family.

Another possibility I considered was that he remained in Glasgow for medical reasons until late August or early September then returned to the front mid-September. After a lot of consideration, I did not think this a very convincing scenario.

In order to try to resolve this I entered into a long exchange with ChatGPT. When I pointed out several contradictions in the whole situation, the LLM tried to resolve it the following way.

After he was married in July 1917, he returned to his regiment and was involved in the action at Passchendaele. At some stage he is removed from front-line duty due to a number of possible reasons including exhaustion, trench fever, diarrhoea, influenza or “debility”. This happened constantly so would not be unusual. He could have been evacuated sick. He may have been returned to the UK enabling him to conceive his first child with Margaret around late August or early September. He may then have returned to the Front later in 1917 to resume his soldiering with his regiment. The truth is, if we accept that Timothy was John’s father – and we have no reason to believe he wasn’t except this one ambiguity – then we might just have to accept that the documentary evidence to support this theory does not exist anymore and that the evidence we do have are just fragments that illuminate little corners of his service life.

There is also another medical possibility but, again, this is difficult to prove before February of 1918 but Timothy did suffer recurring bouts of gonorrhoea and we have documentary evidence of this on two occasions.

If Timothy had returned to the Front soon after his marriage he would have seen further action with his regiment.

The Western Front September – November 1917

The battalion went on to take part in the fighting associated with Polygon Wood (26 Sep 1917), Zonnebeke, Broodseinde (4 Oct 1917), and Passchendaele Ridge (31 Jul – 10 Nov 1917). By the end of the campaign in November 1917, the battalion was badly reduced, suffering from exhaustion, high numbers of casualties, and the effects of prolonged exposure to mud and artillery bombardment.

After Ypres and illness, late 1917–1918

Following Passchendaele, the battalion was withdrawn to the comparatively quieter Cambrai / Bapaume sector, where it undertook trench‑holding and patrol duties while absorbing new drafts of reinforcements. Conditions remained harsh, and sickness was common.

At some point during this period, Timothy contracted gonorrhoea, (see below for more details) a condition widespread among armies during the war. A surviving medical record shows that on 7 February 1918 he was transferred within the BEF medical system, involving No. 34 General Hospital at Le Havre, No. 5 Ambulance Train, and No. 34 Casualty Clearing Station. Le Havre was a major centre for the treatment of venereal disease, where soldiers were treated in segregated wards before being returned to duty if fit.

1918 The German Spring Offensive and Birth of Timothy’s 1st Child

In March 1918, the battalion faced the German Spring Offensive (Operation Michael), which began on 21 March. The 1st Inniskillings took part in defensive fighting and withdrawals under intense pressure. Back hone, on 15 June 1918 Timothy’s wife, Margaret, gave birth to their first child, John McDonald Neil (my father). He was born at 1 South Stirling Street, Gorbals, Glasgow which was almost certainly the home of Margaret’s parents, John and Susan McDonald. At the taking of the 1921 Census the household at 1 South Stirling Street contained Margaret’s mother, father, husband and son. So this is probably where the McDonalds lived throughout the war.

1918 Offensives and Final Evacuation

Returning to the Front, from August 1918, the battalion participated in the Allied Hundred Days Offensive, including the Battle of Albert (August 1918) and the Battle of Cambrai (8–10 October 1918) and Timothy battalion was involved in the final advance of the war. Warfare became increasingly mobile as the Allies advanced through devastated countryside.

Timothy suffered a recurrence of gonorrhoea in the final weeks of the war. On 29 October 1918, he was evacuated from Grévillers, a forward area east of Bapaume, travelling on Ambulance Train No. 31 to Étaples, one of the largest British base medical complexes. His condition rendered him temporarily unfit for duty, and he was removed from the operational zone.

Because the Armistice was signed on 11 November 1918, it is highly likely that Timothy remained hospitalised through the end of the war and did not rejoin his battalion. Many men in hospital at this time passed through demobilisation via the medical system, rather than returning to their units.

End of War and Demobilisation

In 1919, the 1st Battalion, Royal Inniskilling Fusiliers served in Germany as part of the Army of Occupation, before returning to the United Kingdom later that year. But the question still remains what happened with Timothy after his hospitalisation less than two weeks before the Armistice.

The likely course of events was that he was evacuated sick on 29 October 1918 and taken to the base hospital at Étaples where he was diagnosed with gonorrhoea, classed as “temporarily unfit” and  retained under treatment through and beyond Armistice. VD patients were explicitly excluded from immediate demobilisation until their treatment was completed, they were certified as non-infectious and they were cleared by a medical board. This often delayed their release by weeks or months.

From this we can speculate with some confidence that he did not return to his battalion after October 1918 so was not part of the Army of Occupation in Germany. His war ended in hospital but he was still legally a soldier until 1919. The birth of his second child, Mary Ann Chrystal Neil, on 24 November 1919 indicates a conception in approximately late February or early March 1919. It is therefore highly likely that Timothy spent November and December of 1918 under hospital treatment before undergoing medical clearance and demobilisation during January or February 1919 before returned to civilian life in February 1919, shortly before the conception of his second child in late February or early March 1919.

Timeline of Service and Family

Late 1914–1915

Voluntary enlistment (Reg. No. 10241)

1916

Enters overseas service, France

Jul 1917

Home leave

16 Jul 1917

Marriage in Glasgow

Aug–Sep 1917

Passchendaele fighting

Likely delayed leave / evacuation

Conception of first child

15 Jun 1918

Birth of first child – John McDonald Neil – 15 Jun 1918

Feb 1918

Hospitalised for gonorrhoea

Mar–Oct 1918

Spring Offensive and Hundred Days

29 Oct 1918

Evacuated sick from Grévillers to Étaples

11 Nov 1918

Armistice (Timothy still hospitalised)

Feb 1919

Likely demobilisation and return home

Late Feb–Mar 1919

Conception of second child

24 Nov 1919

Birth of second child – Mary Ann Chrystal Neil – 25 Nov 1919

Medal Card

In common with millions of other veterans, Timothy Chrystal Neil was awarded the British War Medal and the Victory Medal, recognising his active service overseas during the First World War. As we have seen above, he did not receive awards given to soldiers who saw action before the end of 1915 and this has given us some information to support our tentative conclusion that he did not enter active duty until 1916. There are two sources for this; the first is his medal card avaialble at FindMyPast.co.uk

1918 Campaign Medal Car Timothy Chrystal Neil [[N142-clip]]

Timothy Chrystal Neil Medal Card 1914-18 War: FindMyPast “Britain, First World War Campaign Medals, The National Archives Record Set Britain, First World War Campaign Medals. Archive Ref WO 329/1130, Record ID GBM/WO329/WWI/CM/4301756”.

And the second his listing on the Medal Roll for the regiment available at Ancestry.co.uk

1918 WW1 Medal Roll Page Timothy Chrystal Neil [[N143-clip]]

Timothy Chrystal Neil Medal Roll 1914-18 War: Ancestry.com “The National Archives of the UK; Kew, Surrey, England; War Office and Air Ministry: Service Medal and Award Rolls, First World War. WO329, Piece 1130: Royal Inniskilling Fusiliers, Ref: 1130 Image 290.”

Timothy Chrysal Neil Medals - Image

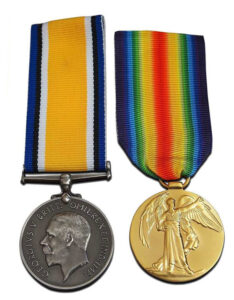
Stock image of the medals that Timothy Chrystal Neil was awarded – not the original medals

The only other direct sources we have are to do with his medical conditions.

Medical Records

The evidence for Timothy’s outbreak/s of gonorrhoea come from two document. The first one is dated 7th February 1918 and it reads “10241 Pte. Neil, T.C. 1/R. Inn. Fus. VDG……Trans to 34 CSS .per 5 AT .ex 34 Gen . H . Havre 7 Feb. 1918.

1918-02-07 WW1 Medical and Sick Record Timothy Chrystal Neil [[N149-clip]]

Timothy Chrystal Neil Medical Record: FindMyPast.co.uk “British Army Service Records, Wo 363 – First World War Service Records ‘Burnt Documents, Series WO 363, 1914-20, Servie No 10241. Record ID GBM/WO363-4/SUPP/416822”

My understanding of this document is that it records Timothy being returned to his battalion from No. 34 General Hospital at Le Havre after treatment for gonorrhoea. Number 5 Ambulance Train takes him to No. 34 Casualty Clearing Station which would have been a site a few miles behind the front lines where train links allowed for the movement of soldiers. Le Havre was a major VD treatment hub. In 1916–1918, men with gonorrhoea were removed from front-line units, treated in segregated wards and sometimes transferred between hospitals during treatment. They were usually returned to duty unless complications arose. Many men treated for VD, but not all, returned to front-line duty within weeks.

The other document I have shows Timothy being moved by train again.

1918-09-29 WW1 Medical and Sick Record Timothy Chrystal Neil [[N149b-clip]]

Timothy Chrystal Neil Medical Record: FindMyPast.co.uk “British Armed Forces, First World War Soldiers’ Medical Records 20 Oct 1918 to 02 Nov 1918, British Expeditionary Force to France, other ranks, Hospital admission and discharge registers. Archive reference MH 106/2008. Hospital
31st Ambulance Train Service number 10241 29 OCT 1918″

This document records Timothy being transferred aboard Ambulance Train No 31 on 29 October 1918; he entrained at Grévillers and detrained at Étaples. By late October 1918 the 1st Royal Inniskilling Fusiliers were advancing as part of the Hundred Days Offensive in the final advance of the war. Timothy was likely diagnosed with gonorrhoea at a Regimental Aid Post or CCS, classified as unfit for duty and marked for evacuation out of the operational zone. Grévillers was a forward area, east of Bapaume, very close to the front during the final Allied advance that was used as a collection point for wounded and sick men. From here Ambulance Trains like No. 31 were used to move men from forward CCS areas to base hospitals, to transport non-walking wounded and sick and to carry men who were ill, exhausted, or temporarily unfit. The fact he went by train (not walking or lorry) suggests that he was not fit to march but also not in immediate danger. Men were still being wounded, sickened, and evacuated right up to 11 November 1918; there was no slowing of medical evacuation until the Armistice actually happened.

Étaples was one of the largest British medical base complexes of the war – not a hospital itself, but a massive medical base area. By late 1918, the British Army had very strict VD control policies, especially for men at the front. VD cases were not allowed to remain with fighting units. Gonorrhoea was considered contagious and a drain on manpower; once diagnosed, men were immediately evacuated out of the line and, even in the final weeks of the war, VD policy did not relax.

Timothy’s infection might have been as a result of a recurrence or complication of the earlier February 1918 infection. After detraining at Étaples, he would have been admitted to a General or VD hospital and held there for weeks, possibly into December 1918. Since Armistice day was 11th November 1918, he might still have been in hospital at the end of the war and may have had to stay there until the end of December. Men already in hospital often stayed there through the Armistice and never returned to their battalions so it is very likely that he never rejoined the 1st Inniskilling Fusiliers after 29 October 1918. Furthermore, He may have gone through demobilisation via the medical system, not via his battalion.

Gonorrhoea took between 6 – 12 weeks to treat. Chronic or relapsing cases could take 2 – 6 months. There were no antibiotics so treatment involved isolation in VD wards, daily painful urethral irrigations with Potassium permanganate and Protargol (silver compound). Strict bed rest was enforced and repeated smears had to be taken. Alcoho; was not allowed and there was no chance of leave. The treatment was slow, uncomfortable, and uncertain. I outlined above how the move from front line to hospital to demobilisation and then back to home might have worked out for Timothy

You can read much more about venereal diseases during WW1 here and here


Sources

  • Findmypast — Soldiers’ medical records (hospital admission/discharge collections). Findmypast
  • Ancestry — UK, WWI Hospital Registers, 1915–1919. Ancestry
  • The National Archives — research guide & MH106 (representative medical records). The National Archives
  • The Long, Long Trail — overview of hospital admission/discharge records and where to look. The Long, Long Trail
  • Forces War Records — collection of Military Hospitals admissions & discharge registers (paywalled).
  • The Western Front Association- The Western Front Organisation
  • Chat GPT
  • Wikipedia

Background to WW1 and 1st Battalion Royal Inniskilling Fusiliers

Background to WW1

Since 1815 the balance of power in Europe had been maintained by a series of treaties. In 1888 Wilhelm II was crowned ‘German Emperor and King of Prussia’ and moved from a policy of maintaining the status quo to a more aggressive position. He did not renew a treaty with Russia, aligned Germany with the declining Austro-Hungarian Empire and started to build a Navy to rival that of Britain. These actions greatly concerned Germany’s neighbours, who quickly forged new treaties and alliances in the event of war. On 28th June 1914 Franz Ferdinand the heir to the Austro-Hungarian throne was assassinated by the Bosnian-Serb nationalist group Young Bosnia who wanted pan-Serbian independence. Franz Joseph, the Austro-Hungarian Emperor (with the backing of Germany) responded aggressively, presenting Serbia with an intentionally unacceptable ultimatum, to provoke Serbia into war. Serbia agreed to 8 of the 10 terms and on the 28th July 1914 the Austro-Hungarian Empire declared war on Serbia, producing a cascade effect across Europe. Russia bound by treaty to Serbia declared war with Austro-Hungary, Germany declared war with Russia and France declared war with Germany. Germany’s army crossed into neutral Belgium in order to reach Paris, forcing Britain to declare war with Germany (due to the Treaty of London (1839) whereby Britain agreed to defend Belgium in the event of invasion). By the 4th August 1914 Britain and much of Europe were pulled into a war which would last 1,566 days, cost 8,528,831 lives and 28,938,073 casualties or missing on both sides.

Structure of the British Army

During the First World War, there were four distinct British armies. The first comprised approximately 247,000 soldiers of the regular army, over half of whom were posted overseas to garrison the British Empire, supported by some 210,000 reserves and a potential 60,000 additional reserves. This component formed the backbone of the British Expeditionary Force (BEF), which was formed for service in France and became known as the Old Contemptibles. The second army was provided by the approximately 246,000-strong Territorial Force, initially allocated to home defence but used to reinforce the BEF after the regular army suffered heavy losses in the opening battles of the war. The third army was Kitchener’s Army, which was composed of men who answered Lord Kitchener’s call for volunteers in 1914–1915 and went into action at the Battle of the Somme in 1916. The fourth army was the reinforcement of existing formations with conscripts after the introduction of compulsory service in January 1916.

By the end of 1918, the British Army had reached its maximum strength of 3,820,000 men and could field over 70 divisions. The vast majority of the British Army fought in the main theatre of war on the Western Front in France and Belgium against the German Empire. Some units were engaged in Italy and Salonika against Austria-Hungary and the Bulgarian Army, while other units fought in the Middle East, Africa and Mesopotamia, mainly against the Ottoman Empire, and one battalion fought alongside the Japanese Army in China during the Siege of Tsingtao.
See Wikipedia

The Royal Inniskilling Fusiliers – Pre 1914

The Royal Inniskilling Fusiliers was an infantry regiment that served through the First World War with multiple battalions on the Western Front, Gallipoli, Egypt and elsewhere. It formed part of the 87th Infantry Brigade, one of the three Brigades in the 29th Division. It consisted of four battalions drawn from garrisons in China, India and Burma. They sailed to England in early 1915 and consolidated near Rugby. The battalions were the 2nd Battalion South Wales Borderers – Tientsin, China, 1st Battalion King’s Own Scottish Borderers – Lucknow, India, 1st Battalion Royal Inniskilling Fusiliers – Trimulgherry, India and the 1st Battalion Border Regiment – Maymyo, Burma.

The Royal Inniskilling Fusiliers Prepare For War

At the outbreak of war in August 1914 The Royal Inniskilling Fusiliers were ordered back to the UK as part of the 29th Division and by January 1915 they were in England preparing at Rugby between 18 Jan 1915 and departing 16 March 1915, sailing to Malta then Alexandria in Egypt and arriving on Lemnos on 24 April 1915. The detailed War Diaries kept by the British Army are invaluable records of the time and are held at the National Archive. They are available there online and at Ancestry.com. There are also some reproductions in both eBook  and printed book form.

The Royal Inniskilling Fusiliers – The Gallipoli Campaign (1915-1916) – Overview

The next day the Royal Inniskilling Fusiliers were part of the landing force at X Beach, Gallipoli along with the 1st Battalion of the Border Regiment. By mid-October 1915 the 87th Brigade, nominally 4,200 men would be reduced to less than 700 men. Only nine out of every ten men of the original 1st Bn Royal Inniskilling Fusiliers would answer the roll call in just six months fighting at Gallipoli.

The Introduction to the eBook “Gallipoli Diaries 1915-1916 of the 1st Battalion of the Royal Inniskilling Fusiliers, part of the 87th Infantry Brigade of the 29th Division” says

The Gallipoli campaign remains one of the most controversial campaigns of the Great War. Modern academics and historians are largely split on the chances of success. The ‘Easterners’ believe it could have worked, knocking the Ottoman Empire out of the war and enabling the opening up of supply routes to Russia. The ‘Westerners’ believe it was doomed from the start and never stood a chance of success; the war could only be decided on the Western Front. The latter group has grown in number in recent years however the campaign still generates heated debate among academics.”

It continues:

In May 1915 the (29th) Division moved to Lemnos, an island close to the Gallipoli peninsula in preparation for the amphibious landings in April 1915. The Battalion would stay in theatre for eight months and took part in some of the most brutal fighting on the peninsula. Fighting at Gallipoli was a fairly unique experience. With their backs to the sea the British forces were rarely out of danger. Most of the ‘rest areas’ were within the range of the Ottoman artillery and were constantly under threat. Artillery and artillery ammunition was in short supply on both sides, so the campaign did not experience the scale of bombardments seen on the Western Front. Despite this, danger came in many other forms. The physical conditions were extreme. The masses of decaying corpses at the height of the Mediterranean summer became breeding grounds for plagues of flies. Few truces were arranged to bury bodies and the flies spread disease rapidly. Dysentery afflicted most men at some stage. Non-battle casualties were horrendous. During the height of the summer the Battalion fought the bitter battles of Krithia on Cape Helles in squalid conditions. In August 1915, after the stuttering progress of the New Army Divisions at the landings at Suvla Bay, the 87th Infantry Brigade along with the 86th Infantry Brigade was sent to Suvla to stiffen the ranks. The battalion consequently took part in what was to be the largest offensive made during the whole campaign in the Battle of Scimitar Hill on 21st August 1915. The 1st Bn Royal Inniskilling Fusiliers took a central role in the attack and suffered heavy casualties. Of the 744 All Ranks who started that day only 288 would remain unscathed. Casualties exceeded 60%. The attack was a failure and proved be the last mass offensive action of the whole campaign. Three weeks later, on 10th Oct 1915 the Brigade took stock of its casualties to date and counted the number of the original cohort who had landed on 25th April some six months earlier. Only 109 of the 1,028 ‘originals’ of the 1st Bn Royal Inniskilling Fusiliers answered the roll call that day. Most had at one stage been wounded or sick and evacuated, only later recover and return to the peninsula. Only 64 of the original battalion had never left Gallipoli.

The Royal Inniskilling Fusiliers – The Gallipoli Campaign (1915-1916) – Details of Actions

Location: Cape Helles. Turkish/Ottoman victory. Frustrated by the stalemate on the Western Front, in 1915 the Allies decided to open up a new front against the Ottoman-Turkish Empire in the Dardanelles.
A new force, the Mediterranean Expeditionary Force under General Hamilton was formed and in April 1915 this force began to initiate its plan of attack on the Turks by landing a force on the Gallipoli Peninsular. The M.E.F. would land in three phases; the Australian and New Zealand Army (ANZAC) Corps’ would land at Z Beach on the west coast at Gaba Tapa, the French force would land at Kum Kale whilst the main British landing would be at Cape Helles.
There would be five landing points at beaches codenamed S, V, W, X and Y. The 29th Division under Major-General Aylmer Hunter-Weston was detailed to make the initial landing and secure the beaches.
Composed in the main of experienced battalions brought back from various points of the Empire, the Division would land in two phases, 86th Brigade, augmented by 2nd South Wales Borderers and 1st King’s Own Scottish Borderers of 87th Brigade and 2nd Hampshire Regiment of 88th Brigade along with Plymouth Battalion and Anson Battalion of the Royal Naval Division, would make the initial landing and establish beach heads, while the main force would follow on behind to secure the high ground of the Achi Baba Ridge and the village of Krithia (Alcitepe) beyond. The success of the operation and fate of the troops was decidedly mixed.
Whilst the main beaches, V and W were mined and defended by barbed wire and machine gun posts, S, X and Y had hardly any defences at all. With the approaches to the beaches being to shallow for large vessels to approach, the troops would approach them in small wooden boats towed behind a steamship.
Once close to the shore the steamship would pull away and the soldiers would row the rest of the way. The exception to this was X Beach where an old Glasgow collier, the SS River Clyde, was adapted as a landing craft to run in close to the shore and be grounded from where troops would disembark.
Prior to the landings the landing points were subjected to an immense artillery barrage from warships stationed offshore, which proved practically useless as the ships were armed with armour piercing ammunition for naval operations, rather than the high explosive shells required to clear shore defences. On S Beach, two companies of 2nd South Wales Borderers landed from HMS Cornwallis at 07.30am under fire from a small Turkish garrison.
A third company landing around the point, they scaled the cliffs to capture the garrison from above. The battalion then remained where they were.
2nd Royal Fusiliers and A Company of 1st Lancashire Fusiliers landing at X Beach found their landing totally unopposed. The twelve Turkish defenders having been frightened away by the bombardment from HMS Implacable and HMS Dublin.
By 06.30am they had begun to reach the top of the cliffs and by 07.30am the whole of the battalion was there. One company being left to cover the beach, a second company secured the high ground to the north-east, where they were held up by Turkish resistance.
The rest of the battalion moving south-west to secure Hill 114, between X and W Beaches, assisted by 1st Border Regiment and 1st Royal Inniskilling Fusiliers from the second phase landings, by 11.00am. Y Beach was also unguarded, 2000 men from 1st King’s Own Scottish Borderers, Anson Battalion and A Company of 2nd South Wales Borderers landing totally unopposed, the whole force being larger than the entire Turkish garrison on the peninsular at that time.
Moving up Gully Ravine to the top of the cliffs above there was dissension among the officers in command as to what they should do next. Entirely unaware of the disasters unfolding at V and W Beach they did nothing and waited for something to happen.
What did happen was that Turkish reinforcements counter-attacked at dusk, resulting in 700 casualties. As the wounded were evacuated to the British battleships offshore, an unauthorised withdrawal began and the beach was deserted by midnight on 26th April.
The easternmost of the landing beaches, V Beach, overlooked by Fort Etrugrul and Sedd el Bahr castle was defended by little more than A Company of men armed with rifles and four machine guns. However so well sited were they that 1st Royal Dublin Fusiliers in their small boats came under devastating fire as soon as they approached the shore.
As did 1st Royal Munster Fusiliers and 2nd Hampshire Regiment as they attempted to leave the the SS River Clyde. The artillery bombardment having done little to clear the barbed wire emplacements on the beach, the survivors of the landings struggled through it to attempt to find safety in the lee of a low ridge on the far side of the beach where they were forced to stay.
W Beach was intended to be the main landing point for the M.E.F. and was assaulted by troops of 1st Lancashire Fusiliers landing from HMS Euryalus and HMS Implacable. Again the artillery bombardment had done little to disturb the barbed wire entanglements and to add to the difficulty of the disembarking troops the beach was also mined and protected by machine-guns.
Approaching the shore under a fusillade of bullets, the survivors attempted to hack and negotiate their way through the barbed wire and mines to reach the Turkish machine-guns. Gradually a foothold was gained and as more troops made the shore the Turkish trenches were overrun.
Moving out from the beachhead, by early afternoon they had joined-up with 2nd Royal Fusiliers at Hill 114 and with assistance from 4th Worcestershire Regiment had captured Hill 138. Six men of 1st Lancashire Fusiliers, Captain Bromley, Captain Willis, Sergeant Stubbs, Sergeant Richards, Lance Corporal Grimshaw and Private Kenealy were all awarded the Victoria Cross for their actions during the W Beach landing. 

Location: Sedd el Bahr. Isolated British victory. On 25th April, parties of men from 1st Royal Dublin Fusiliers, 1st Royal Munster Fusiliers and 2nd Hampshire Regiment of 29th Division, had come under heavy fire from Turkish positions in the old fort above the village of Sedd el Bahr whilst attempting to land on V Beach, Cape Helles.
Pinned down on the beach, the following day Colonel Charles Doughty-Wylie, a staff officer attached to General Hamilton’s staff and Captain Garth Walford, Royal Artillery, organised the survivors into attacking the village and fort at Sedd el Bahr and thus free the beach. After a fierce gunfight the British captured both the village and fort.
Colonel Doughty-Wylie and Captain Walford were both awarded posthumous Victoria Crosses for bravery during the action.

Location: advance on Krithia (Alcitepe). Turkish/Ottoman victory. Desperate to break out of the beach heads on Cape Helles, General Hamilton directed General Hunter-Weston to capture the village of Krithia (Alcitepe) behind the Turkish lines and the high ground of Achi Baba hill, one of the objectives of the first day.
Hamilton’s intention was to push the Turks out of their defensive posts on the high ground of the Gallipoli peninsula and to drive northwards to seize Constantinople, opening up a supply route to the Russian ports in the Black Sea. A two pronged attack with British forces on the left of the Turkish line and French on the right was repulsed with heavy losses after an encouraging start.
The Turks counter attacked and broke the British lines; only a bombardment from HMS Elizabeth prevented another disaster. A British attack on the centre of the Turkish line was also repulsed with heavy casualties by an outnumbered Turkish force.
Following a humiliating withdrawal, by nightfall British troops were back in the positions they had left that morning. Commencing with a naval bombardment at 08.00am, the attack was led by 29th Division, 87th Brigade on the left, 88th Brigade in the centre and French on the right.
86th Brigade being in reserve. The advance of 87th Brigade, 1st Border Regiment and 1st Royal Inniskilling Fusiliers being held back at Gulley Ravine above Y Beach, 88th Brigade made good ground towards Krithia to come up level with them.
Meeting strong opposition 86th Brigade, 2nd Royal Fusiliers and 1st Lancashire Fusiliers, came up in support, the advance reaching to within a mile of the village before being pushed back.

Location: line north of Eski Hissarlik. British/French victory. A Turkish night time counter attack led by German General Liman von Sander on British and French defensive positions near Achi Baba.
Intended to drive the Allies back onto the beaches, it nearly succeeded but for the arrival of reinforcements to the Allied lines and that the British troop commanders had expected just such an attack. The French line, held by Senegalese Colonial troops was broken by the Turks but British reinforcements from the Royal Naval Division and 4th Worcestershire Regiment of 29th Division bridged the gap.
86th Brigade also being attacked, 2nd Royal Fusiliers came to the assistance of 1st Royal Munster Fusiliers, the attackers reaching as far as the reserve trenches held by 5th Royal Scots (Lothian Regiment) who were able to counter-attack.

Location: Fir Tree Spur. Turkish/Ottoman victory. A continuation of the April battle to take Krithia and Achi Baba.
Having already lost 6,000 of the original 20,000 troops, two Anzac Divisions, the Australian 2nd Infantry Brigade and New Zealand Infantry Brigade were attached to the British forces, plus Hood Battalion from the Royal Naval Division and 125th Brigade from 42nd (East Lancashire) Division. Additionally the 29th Indian Brigade would be held in reserve.
Despite elaborate planning also involving French troops the attack was a disaster with advances of only a few hundred yards being made at a high cost in casualties. The Allies were ignorant of the exact location of the Turkish defences; aerial reconnaissance had revealed little and the terrain was crossed by deep gullies affording excellent cover to defending troops.
A shortage of high explosive artillery ammunition rendered shrapnel barrages ineffective against scattered positions. On 8th May the attack was renewed across the whole front with the Anzacs being brought out of reserve; advancing against heavy defensive fire the New Zealanders gained sight of the Turkish lines as did French troops who seized a section of trench, holding it until overwhelmed.
As the attack dwindled, Allied troops withdrew under cover of darkness to their trenches. 29th Division having suffered so many casualties in the earlier actions at Gallipoli, 86th Brigade was broken up, the remnants of the battalions reinforcing 87th Brigade and 88th Brigade.
The reinforced 88th Brigade being in the centre of the attack, with 87th Brigade behind it, passing through for the second phase. 88th Brigade, 4th Worcestershire Regiment, 2nd Hampshire Regiment and 5th Royal Scots (Lothian Regiment) were only able to advance a few hundred yards up Fir Tree Spur where they were halted by machine-guns from a small wood, 2nd Royal Fusiliers and 1st Essex Regiment reinforcing the position.

Location: Gurkha Bluff. British/Indian (Gurkha) victory. The 6th Gurkha Rifles (29th Indian Brigade) were the first Gurkha regiment posted to Gallipoli and also the first Gurkha regiment to see action in that ill-fated campaign.
Attached to 29th Division, following a successful reconnaissance exercise, the Gurkha Rifles were detailed to deal with Turkish machine guns which had been firing on British positions from the top of Gully Ravine. Working their way through the undergrowth and scaling the 300 feet high near-vertical cliffs, the Gurkha Rifles were able to advance on the Turkish positions by leapfrogging forward with their own riflemen and machine gun teams.
In recognition of their skill and bravery, the cliffs would be known as Gurkha Bluff. Two previous attempts to scale the cliffs by the Royal Marines Light Infantry and 1st Royal Dublin Fusiliers had ended in failure. 

Location: Gully Ravine. Turkish defensive victory. The final action in a series of battles for the village of Krithia (Alcitepe) and Achi Baba hill which had been the objectives of the first day.
With British forces on the Gallipoli Peninsula reinforced, General Hamilton now had 29th Division, Royal Naval Division, 42nd Division and 29th Indian Brigade at his disposal. With clear objectives communicated to all of his officers, the initial advance would be made on the Turkish lines; having taken these the infantry would advance a further 500 yards, halt and consolidate their positions.
A double artillery barrage, with a break of 10 minutes would allow the Turks time to get out of shelter and into position before the next barrage commenced. 42nd Division’s advance proceeded apace through the Turkish lines and 500 yards beyond; the Royal Naval Division also drove through the enemy lines but were caught by heavy fire from positions where the French advance had failed.
Other battalions were held up by Turkish machine gun fire, the 14th Ferozepore Sikhs losing almost 400 troops out of their battalion strength of 500 and 80% of their officers in Gully Ravine. With the French forces to extreme right also halted and 42nd Division in a small salient, Hunter-Weston ordered a consolidation of all positions at 16.00 hours; simultaneously the Turks launched a counter attack on 42nd Division who were ordered to withdraw.
By the time that the counter attack had been stopped, the new British line was less than 300 yards in front of that morning’s start position. 29th Division on the left concentrated their attack on Gully Ravine and Fir Tree Spur, whilst 29th Indian Brigade attached to them attacked Gully Spur on the left.
The advance meeting strong resistance little was gained other than more casualties. When the Turkish counter-attacked the following day, 2nd Lieutenant G.R.D. Moor, 2nd Hampshire Regiment was awarded the Victoria Cross for his actions in halting a retirement and recapturing the position. 

Location: Fusilier Bluff. British victory/Inconclusive. Following a French victory on 21st June on the right of the Allied lines, a British attack along the left flank was proposed for 28th June.
In addition to 29th Division and 29th Indian Brigade, 156th Brigade of 52nd Division were drafted in. A two day bombardment from land batteries and battleships preceded the attack, 10th Gurkha Rifles and 2nd Royal Fusiliers advancing over half a mile to point later known as Fusilier Bluff.
1st Border Regiment‘s advance was halted by Turkish troops who had been able to shelter from the barrage, the Borders consolidating their position. Troops from 156th Brigade met heavy rifle and machine gun fire in Gully Ravine.
Without artillery or naval support, they were pinned down but ordered to ‘press on’; soldiers from the reserve and support lines were brought up but by the end of the attack, the Brigade had lost 1400 casualties, 800 of whom were dead. Fierce Turkish counter attacks on 1st and 2nd July were made at huge cost in casualties; at 18.00pm the Turks attacked again, coming within 30 yards of the British front line before falling in front of the trenches.
With concern over their mounting losses the Turkish counter attacks stopped after another failure on 5th July; the lines stabilised for the remainder of the campaign, although individual actions would take place. Captain G.
O’Sullivan and Sergeant J. Somers, 1st Royal Inniskilling Fusiliers, and 2nd Lieutenant H. James, 4th Worcestershire Regiment were each awarded the Victoria Cross for their actions during the attack and the Turkish counter-attacks. Fusilier Bluff was the furthest point north that Allied troops reached from Helles and the actions here are marked by the Nuri Yamut Memorial (Nur Yamut Aniti), named after the local Turkish commander who sold his house to build it.

Area of attack on Fir Tree Spur. Turkish victory. Originally devised as a diversionary action to deflect Turkish Ottoman attention away from the forthcoming relief landing at Suvla Bay, it developed into a further attack on Krithia (Alcitepe).
The attack began on 6th August with 88th Brigade of 29th Division capturing some of the Turkish trenches before being forced back with heavy casualties. 4th Worcestershire Regiment, 1st Essex Regiment and 2nd Hampshire Regiment were all involved in the attacks on Fir Tree Spur.
The following day two brigades of 42nd Division broke through the Turkish lines around Krithia Vineyard but were forced back by a Turkish counter-attack. The Turkish counter-attacks continued repeatedly until 9th August and the fighting in the area did not subside until 13th August.
Between 16th-21st August, the infantry brigade and support units of 29th Division moved to Suvla and came under IX Corps. Whilst the 29th Divisional Artillery remained at Helles under VIII Corps.
88th Brigade suffered around 2000 casualties during the attacks on 6th August, 4th Worcestershire Regiment suffering particularly heavily, reportedly having only 16 survivors of 790 men who went into action. 

Location: Suvla Bay. Between 16th and 21st August, 29th Divisional H.Q., 86th, 87th , 88th Infantry Brigades, Royal Engineers 2nd London, 2nd Lowland, 1st West Riding Field Companies, R.E. 1st London Signal Coy., R.A.M.C. 78th, 88th, 89th Field Ambulances moved to Suvla under command of IX Corps. The Divisional Artillery remained under VIII Corps at Helles.

Location: Scimitar Hill. Turkish/Ottoman victory. The final British offensive at Suvla it was also the largest single-day attack mounted by the Allies at Gallipoli.
The purpose of the attack was to remove the immediate Turkish threat from the exposed Suvla Bay landing site and to link with the ANZAC sectors to the south. Launched on 21st August, 1915, to coincide with the simultaneous attack on Hill 60, it was a costly failure.
Major-General Beauvoir de Lisle, IX Corps’ and 29th Division‘s commander wished to join with Anzac troops to the south; to do so, Scimitar Hill and its neighbouring ranges the W Hills and Hill 60 had to be taken. De Lisle planned to use 29th Division against Scimitar Hill, 11th Division against the W Hills and keep 2nd Mounted Division in reserve.
The preliminary barrage was ineffective, 11th Division were thrown into panic by the presence of Turkish strong points and artillery on W Hills and although 1st Royal Inniskilling Fusiliers took Scimitar Hill, they came under enemy artillery fire from the east and south. Forced to withdraw from the burning hill (grass and scrub had been ignited by artillery explosions), they retired to their original positions.
The dismounted Yeomanry were drawn forward, but their objective was obscured by smoke from the earlier battle; advancing in columns they were a soft target for the Turkish artillery’s shrapnel. As the survivors took shelter, Brigadier-General Lord Longford led a detachment of the 2nd South Midland Mounted Brigade to Scimitar Hill; Longford was killed and his troops forced to withdraw.
The front line remained static from Green Hill (where the Yeomanry took cover) and Scimitar Hill until the Allied withdrawal.

Location: Suvla Bay. Successful Allied operation. With public opinion in Britain, her Empire and France turning against the war in the Dardanelles, plans were put into place for an evacuation of the Gallipoli Peninsula.
General Hamilton was recalled to London and replaced by Sir Charles Monro. Having seen the state of affairs at Helles, Suvla and Anzac Cove for himself, Monro recommended an immediate withdrawal.
Initially dismissive of withdrawal, Lord Kitchener replaced Monro with Lieutenant General William Birdwood and travelled to the Peninsula. Appreciative of the reasons for withdrawal Kitchener approved the plans on 23rd November and withdrawal from Anzac Cove and Suvla Bay was sanctioned for 7th December with the operation taking place during the night of 19th -20th December 1915.
The evacuation was carried out successfully with almost no casualties, the rearguard burning the stores and equipment that could not be taken behind them. 105,000 men and more than 300 artillery pieces were taken off the beaches.
The 87th Infantry Brigade and R.E. 2nd London Field Coy had returned to Helles on 1st October and 2nd November respectively; 86th and 88th Infantry Brigades, R.E. 2nd Lowland and 1st West Riding Field Companies returned to Helles between 16th and 22nd December, coming under VIII Corps command. The R.A.M.C. Field Ambulances were left at Imbros and Mudros.

Location: Cape Helles Memorial. Turkish/Ottoman victory. Following the successful evacuation of Anzac Cove and Suvla Bay, British troops still at Cape Helles were outnumbered by the Turks by five to one; on 27th December the War Cabinet in London granted permission for the evacuation and on 1st January 1916, plans were approved with French troops being the first to leave.
To cover their withdrawal, the 29th Division were recalled. The operation was scheduled to end on 9th January 1916 and by the 7th, 19,000 troops remained out of a total of 35,000.
Also on that day the Turks launched an attack led by German General Liman von Sanders; carrying scaling ladders, timbers and flammable materials their objective was to loot stores and burn everything else. As they crossed No Man’s Land the Turks came under heavy rifle and machine gun fire which halted their progress; British observers noted that the Turkish soldiers were reluctant to renew their advance and having suffered with heavy casualties, the Turks withdrew.
Overnight the British also withdrew, back to their lines near the beach at Helles where makeshift piers had been constructed to aid the evacuation. Over 35,000 soldiers with transport, ammunition and horses were removed, but significant amounts of equipment were destroyed; several hundred horses and mules were shot to prevent their use by the enemy.
At around 04.00am on 8th January 1916 the final British soldiers left Cape Helles, later that morning Turkish forces were in possession of the beach. After the Evacuation of Helles, the 29th Division was transferred to Suez, Egypt.
On 25th February the Division was ordered to France.

The War on the Western Front (1916-18)

Location of the 1914-1918 Battlefields of the Western Front from The Great War web site

Battlefields of the First World War.

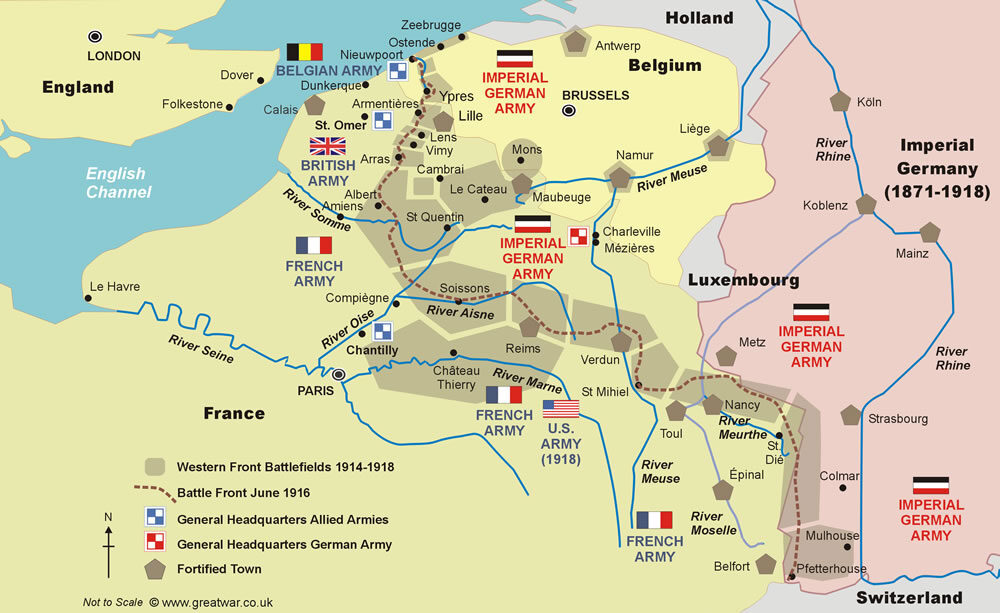
This map illustrates the battlefield sectors of the 1914-1918 Western Front. The line of battlefields ran through a wide variety of landscapes from its northern end in the dunes of the West Flanders Belgian coast to the frontier crossing at the village of Pfetterhouse on the Swiss-German (Alsace) border. The Franco-German border east of Belfort and St. Dié is shown on this map as it was in 1914 when war broke out. Clicking on the link above or the map itself takes you to the online, interactive version of the map where you can click on a shaded area for the location of the battle sector and a brief comment. “Some of the battle sectors are expanded with detailed information pages about the battles fought there, listings of cemeteries, memorials, museums, battle sites, events and visitors’ information.”

Rested, absorbed drafts of reinforcements, and re-equipped. Spent several weeks defending positions around the Suez Canal.

Location: Pont Remy. The 29th Division embarked at Suez in early March, disembarked at Marseille and concentrated near Pont Remy on the Somme River between 15th and 29th March. For the remainder of the Great War 29th Division served in France and Belgium on the Western Front.
 

Location: Newfoundland Memorial Park, Beaumont Hamel. Allied Pyrrhic victory. British Fourth and French Sixth Armies attacked on a front between Gommecourt to the north of Albert and Foucoucourt to the south.
The British and French Army attacks to the south of the Albert-Bapaume road were very successful, inflicting a considerable defeat to the German Second Army. However, north of the Albert-Bapaume road, the British attack was a catastrophe and constituted most of the 60,000 casualties on the first day of the battle.
29th Division in VIII Corps were attacking Beaumont Hamel, just north of the River Ancre. The attack was led by 86th Brigade’s 2nd Royal Fusiliers and 1st Lancashire Fusiliers, 87th Brigade’s 1st Royal Inniskilling Fusiliers and 2nd South Wales Borderers, with 88th Brigade remaining in support.
Following the explosion of the Hawthorn mine on 4th Division‘s front to their left, 2nd Royal Fusiliers rushed forward in an attempt to seize the edge of the crater, but found that the German reserves had got there first and pinned down the fusiliers. With heavy machine-gun fire holding up the advance across No Man’s Land, particularly on 86th Brigade’s front opposite Beaumont Hamel, 1st Essex Regiment and the Royal Newfoundland Regiment were sent forward from 88th Brigade to assist the attack.
By 10.15am it was clear that with rapidly mounting casualties the attack had come to a halt and the remaining men formed a defensive front. The Inniskillings suffered devastating losses.
The area over which 29th Division attacked is now known as Newfoundland Memorial park, in memory of the men from that Regiment lost whilst participating in their first action of the War.
 

Actions around Guillemont and Ginchy – Aug – Sep 1916

Location: Royal Newfoundland Memorial, Gueudecourt. Individual British victory/Indecisive overall result. Final British Fourth Army offensive during the Battle of the Somme and intended to secure the Transloy Ridge, with simultaneous advances on Ligny and Le Sars.
29th Division being in XV Corps reserve during the offensive, 88th Brigade moved forward on 10th October to assist 12th Division with its attack on trenches north and north-west of Gueudecourt. 1st Hampshire Regiment and Royal Newfoundland Regiment captured part of Hilt Trench in an attack on 12th October.
An overnight raid by 4th Worcestershire Regiment on 15th-16th October captured a number of abandoned enemy gun pits and dugouts; in one dugout four wounded soldiers were found, one German and the rest British, having been there several days left behind from an earlier raid. That raid had captured part of a German trench system which had been linked to the British trenches; the remainder of Hilt Trench and Grease Trench was still held by the Germans and 4th Worcestershire Regiment with 2nd Hampshire Regiment and 35th Brigade in support were tasked with its capture.
In pouring rain at 03.40am on 18th October, following a creeping artillery barrage the attack was launched. The first attempt by a single company of 4th Worcestershire Regiment failed against uncut wire but a second attempt met with success.
The three other companies of 4th Worcestershire Regiment with the 2nd Hampshire Regiment pushed forward behind the barrage to take their objectives. A sunken road behind the trenches was found to have numerous occupied German dugouts; with bomb, bayonet and rifle these were cleared and more than 200 prisoners taken.
This was the only success that day, although several counter attacks were repulsed. In continuing rain and worsening ground conditions 4th Worcestershire Regiment and 2nd Hampshire Regiment were relieved by 2nd South Wales Borderers and 1st Royal Inniskilling Fusiliers of 87th Brigade on 19th October.
The Royal Newfoundland Memorial is on the site of the part of Hilt trench captured by the regiment on 12th October.

Location: area of Landwehr Trench. British victory. A minor operation conducted by 87th Brigade of 29th Division intended to lead the enemy into thinking that 1916’s battles would be continued.
Moving out from positions north of Lesboeufs, the Brigade attacked on a front 750 yards wide with their objective being Landwehr Trench 400 yards distant towards Le Transloy. At 05.30am British artillery supplemented by trench mortars from the Royal Newfoundland Regiment opened up on the German trenches.
Companies from 1st Royal Inniskilling Fusiliers and 1st Border Regiment, supported by C Company Royal Newfoundland Regiment advanced over frozen ground and quickly took the Germans by surprise, capturing more than 300 prisoners. Sergeant E.
Mott, 1st Border Regiment, was awarded the Victoria Cross for his actions during the attack.

Location: Sailly-Saillisel. On 28th February, 86th Brigade of 29th Division in XIV Corps, conducted an attack on German trenches, Potsdam Trench and Palz Trench close to the village of Sailly-Saillisel. 2nd Royal Fusiliers, 1st Royal Dublin Fusiliers and 1st Lancashire Fusiliers conducting the attack, the majority of the gains were held against the subsequent German counter-attacks. 

Location: Royal Newfoundland Memorial, Monchy-le-Preux. Initial British victory/later stalemate. 9th April 1917 saw the opening of the Battle of Arras and a number of victories for the Allies; the Canadian Corps had captured much of Vimy Ridge, the 9th (Scottish) Division advanced further than three miles in a single day and the 4th Division took the village of Fampoux.
But due to the weather, the difficulty of moving artillery over blasted ground as well as poor communication and rivalry between commanders the successes could not be exploited. 29th Division being in VI Corps reserve during the initial attack, moving up during the night of 12th -13th April to continue the attack on Hill 100, Infantry Hill, east of the village of Monchy-le-Preux.
1st Essex Regiment and the Royal Newfoundland Regiment of 88th Brigade attacked at 005.40am on morning of 13th April, by 07.00am the hill was reported as being in British control. A German counter-attack, carried out almost immediately retook Infantry Hill and threatened the village of Monchy.
Only the actions of a small group of reserves of the two battalions, led by the Newfoundlanders commanding officer, Lieutenant-Colonel James Forbes Robertson, who with a handful of soldiers kept the large enemy force at bay for several hours until relieve during the evening. The actions at Monchy-le-Preux cost 1st Essex Regiment and Royal Newfoundland Regiment over 1000 casualties, the two support battalions, 2nd Hampshire Regiment and 4th Worcestershire Regiment also suffering large losses.

Location: Bois du Vert, Infantry Hill, Monchy-le-Preux. Inconclusive. On 23rd April, the British launched an assault east from Wancourt towards Vis-en-Artois.
Elements of the 30th and 50th Divisions made initial gains, and were able to secure the village of Guemappe but could advance no further east and suffered heavy losses. 9th Division in VI Corps again attacking Infantry Hill, east of Monchy-le-Preux.
Making some gains and holding them against German counter-attacks. 2nd Royal Fusiliers continuing the attack on 24th April, they moved the line forward to east of the Bois du Vert. 

Location: Monchy-le-Preux. Although attacks in late April had seen little gain, with the French Army facing defeat in the south the Allies were pressured to keep the Arras front going. So on 3rd May a further major attack was staged east from Monchy along the River Scarpe valley.
Other than the Canadian Division capture of Fresnoy little was gained and the attack was called off the following day after incurring heavy casualties. 29th Division had been relieved by 12th Division following their capture of Infantry Hill, east of Monchy-le-Preux on 23rd-24th April and were in VI Corps reserve during the attacks of 3rd and 4th May.

Location: Wijdendreft. British success in overall indecisive action. The second major Allied attack of the Third Battle of Ypres.
The attack succeeded in the north, from Langemarck to Drie Grachten (Three Canals) but early advances in the south, on the Gheluvelt Plateau, were forced back by powerful German counter-attacks. The course of the battle was hampered by the atrocious weather and ground conditions which affected the British attack through low-lying areas that had been heavily bombed.
29th Division on the left of XIV Corps were in the far north of the British advance, next to the French and opposite the hamlet of Wijdendreft, north of Langemarck. 87th Brigade and 88th Brigade advanced on 16th August, the troops crossed the Steenbeek on foot bridges, the Division moving across country clearing several German strong-points along the way, to halt at the Broembeek, north-west of Langemarck.
Company Quartermaster-Sergeant W. Grimbalston and Company Sergeant-Major J.
Skinner, 1st King’s Own Scottish Borderers were both each awarded the Victoria Cross for their actions during the advance.

Location: ‘t Goed ter Vesten Farm, Langemarck. British victory. The objective of the attack was to complete the British hold on Gheluvelt Plateau; by capturing Broodseinde Ridge and Gravenstafel Spur the British lines’ southern flank would be afforded some protection, opening up a route to the Passchendaele Ridge.
Using his favoured ‘Bite and Hold’ method, General Plumer had set two objectives, a line just short of the ridge and a second just over the crest. A creeping barrage with machine gun support would move forward with the assault troops, both following a strict timetable.
At 06.00 hours as a hurricane bombardment hit the German lines, British troops left their trenches. Despite the artillery barrages, fierce resistance slowed the advance, 1st Anzac Corps surprised a party of Germans who were advancing on the British lines and a brief, close quarter fight developed until the Germans were subdued.
A series of defensive positions just below the crest were captured and shortly after 09.00 hours the Anzacs cleared the top of Broodseinde Ridge; by midday both X Corps and the Fifth Army had gained their objectives. The operation had not been without considerable cost, Second Army (including the Anzacs) and Fifth Army losing almost 17,000 killed, wounded and missing in the period from 4th to 8th October.
29th Division in XIV Corps in the far north of the battle area, along the Ypres-Staden Railway, north-east of Langemarck, only 1st Royal Dublin Fusiliers, 86th Brigade and 1st King’s Own Scottish Borderers, 87th Brigade making a limited advance to capture ‘t Goed ter Vesten Farm with with relatively light casualties. Sergeant J.
Ockendon, 1st Royal Dublin Fusiliers being awarded a Victoria Cross for his actions during the advance.

Location: Namur Crossing, Langemarck. German victory. Haig sought to renew the offensive against the high ground of Pilckem Ridge and called upon the British Second Army and Fifth Army for the main assault.
The incessant rain which hampered preparations had turned the battlefield into a sea of mud; at 5.20am on 9th October, British and Australian troops attacked across a waterlogged landscape devoid of any form of cover except water filled shell holes. The creeping barrage, under strength because neither sufficient ammunition or heavy artillery pieces could be brought forward failed to suppress the German defenders or cut the thick belts of barbed wire.
Many of the artillery shells landing in the soft ground failed to impact hard enough to explode. Around mid day the attack halted, was forced to withdraw and by the end of the day the survivors had returned to their lines.
Of an attacking force of 30,000 men, 7,000 were killed, wounded or were missing and only one of the main objectives had been taken. The Guards Division, 4th and 29th Divisions in XIV Corps attacked towards the north and east along the alignment of the Ypres-Staden Railway, north-east of Langemarck, supported by the French First Army on their left flank.
The Guards Division managed to advance 2,500 yards to the Houthulst Forest and troops from the 7th Division took the town of Reutel. 29th Division in the centre advanced with 88th Brigade, 4th Worcestershire Regiment and 2nd Hampshire Regiment the lead battalions.
Clearing the first objective, Namur Crossing, the battalions pushed on to capture Pascal Farm and the second objective. Where the support battalions, Royal Newfoundland Regiment and 1st Essex Regiment moved through to complete the capture of the final objectives including Cairo House and Cinq Chemins Farm.
Private F.G. Dancox, 4th Worcestershire Regiment being awarded the Victoria Cross for his actions during the advance.

Location: Marcoing. British victory. A surprise attack by tanks able to destroy German barbed wire defences, Hindenburg Line broken by tanks and infantry and much ground gained as Germans retreated.
The advance began at dawn with six infantry divisions from III Corps and IV Corps, supported by nine tank battalions with over 400 tanks following through the smoke of a creeping barrage. Although the German forces were not taken completely by surprise, the attack overwhelmed them with successful breaches of the massed wire defences of the Hindenburg Line, the tanks carrying rolls of timber baulks (known as fascines) to allow them to cross the wide trenches.
Following a gain of 3 miles the advance stalled as the cavalry were unable to take their objectives and the tanks began to become unserviceable due to enemy action or mechanical breakdown. Crucially the high ground of Bourlon Wood was still in German possession.
29th Division which had been held in reserve now moved up to secure the high ground at RumiIly on the outskirts of Cambrai. 29th Division in III Corps moved forward in a three brigade front south of Cambrai.
86th Brigade capturing Neuf Wood and reaching Noyelles-sur-Escaut, 87th Brigade, Marcoing and 88th Brigade, Les Rues Vertes and part of Masnieres. The move across the St Quentin Canal at Masnieres being halted when the bridge collapsed as a tank attempted to cross it.
The Division holding its gains against strong German counter-attacks on 21st November.

Location: Royal Newfoundland Memorial, Masnieres. Initial German victory which ended in stalemate. As the British advance stalled, the German army was able to bring up reserve troops and plan a counter attack; a gas attack gave the British a hint of what was to come.
At 06.00am on 30th November, German artillery bombarded Allied positions around Cambrai, their plan being to cut the Bourlon salient off from the British front line. Within 2 hours the Germans had counter advanced almost 3 miles through British lines, breaking the British command chain and causing widespread confusion.
General Byng’s Third Army, especially III Corps and VII Corps were in danger of being trapped. VII Corps’ sparsely defended left flank was crushed and gaps were opened in III Corps’ right flank.
Haig ordered a general withdrawal to a shorter line. North of Cambrai British gains bulged into territory previously held by the Germans.
To the south, British forces had been pushed back by 3000 yards; ground which had cost so many lives to take had been surrendered to the enemy. Field Marshal Haig ordered a withdrawal from the Bourlon Wood salient ‘With the least possible delay’.
Much of the ground gained by British forces was now under German occupation, although the British still held ground in the north of the area. The campaign to take Cambrai had not delivered; as a major strategic offensive to break enemy lines, capture the town and German supply routes it was a defeat which had cost the British forces more than 45,000 casualties, of whom almost 10,000 were taken prisoner.
German losses were estimated at between 40,000 and 50,000. 29th Division in III Corps came under severe pressure in their positions on the St Quentin Canal at Marcoing and Masnieres.
Even the Divisional Headquarters at Gouzeaucourt, 3 miles behind the British lines, coming under attack as the Germans swept through to their right. 87th Brigade, 1st Royal Inniskilling Fusiliers, 1st Border Regiment and 2nd South Wales Borderers holding the left sector, around Marcoing, and 86th Brigade, 1st Lancashire Fusiliers, 2nd Royal Fusiliers and 16th Middlesex Regiment holding Masnieres.
88th Brigade coming up in support, 1st Royal Guernsey Light Infantry were involved in their first major action of the War. The Royal Newfoundland Regiment Memorial on the northern approach to Masnieres commemorates the counter-attack by 88th Brigade that halted the German advance on the northern outskirts to Masnieres.

Location: Gauchy. German victory. In the early morning of 21st March, the German Spring Offensive, ‘Operation Michael’ began, when German artillery launched the largest artillery bombardment of the war, swiftly followed by rapidly advancing shock troops, against the British Fifth Army, Third Army and units of the First Army stationed in and around St.
Quentin. Over 3.5 million shells were launched along a 40 miles (60km) front covering 150 sq miles (400 sq km) onto an area held by British Third and Fifth Armies.
The Armies held for as long as they could but faced with overwhelming numbers and broken communications they were forced into a fractured retreat. When the attack on Fifth Army came, 36th (Ulster) Division in XVIII Corps, were holding a position from the River Somme at Gauchy, south-west of St Quentin, to the east of Urvillers, a distance of around 3.4 miles (5.5km).
All three brigades were in the line, holding it on a single battalion front. 109th Infantry Brigade on the left, 2nd Royal Inniskilling Fusiliers in the front line, 1st Inniskilling Fusiliers in the second line and 9th Inniskilling Fusiliers in reserve, 107th Infantry Brigade in the centre, 15th Royal Irish Rifles in the front line, 1st Irish Rifles in the second line and 2nd Irish Rifles in reserve and 108th Infantry Brigade on the right, 12th Royal Irish Rifles in the front line, 1st Royal Irish Fusiliers in the second line and 9th Royal Irish Fusiliers in reserve.
With depleted numbers and such a lengthy sector to hold, rather than a continuous line, the battalions manned the front in a number of individual posts and Redoubts. Attacked by three German divisions, 1st Bavarian Division, German 36th Division and German 238th Division, the front line posts put up as much resistance as they could, many holding on until well into the afternoon against ever increasing odds.
The German attack breaking through at Essigny, south of 108th Infantry Brigade, the Division was driven back through their second line towards the Somme at Fontaine-les-Clercs, Artempts and Tugny-et-Pont. Crossing the St Quentin Canal and River Somme during the night, they blew the bridges after them.
22nd March was spent in holding the banks of the St Quentin Canal, 1st Inniskilling Fusiliers putting up fierce resistance at Fontaine-les-Clercs, before orders were received to withdraw back behind the Somme at Sommette-Eaucourt. Crossing the Somme Canal at Dury and Saint-Simon, the Division took up positions on the south bank from Sommette-Eaucourt to west of Jussy.
On 23rd March, the Germans forcing a passage across the Somme Canal at Jussy, the Division’s position on the Canal bank became untenable and they were pushed west. 9th Royal Irish Fusiliers participating in a rearguard action that held up the advance at Villeselve.
It has been estimated that the 36th (Ulster) Division lost 2392 casualties on the first day of the Operation Michael. 2nd Lieutenant E.
de Wind, 15th Royal Irish Rifles, was awarded a posthumous Victoria Cross for his actions at the Racecourse Redoubt in Gruiges.

Location: Villeselve. German victory. 36th (Ulster) Division had retreated back from the River Somme on 23rd March to positions between Golancourt and Cugny.
109th Infantry Brigade attempting a counter-attack at Golancourt during the early hours of 24th March, the attack was foiled when the German troops arrived in their own attack. Fierce fighting continued throughout the morning as the Division withdrew to Villeselve where around midday they came under heavy artillery bombardment.
With the French on their right withdrawing during the afternoon the Division had no choice but to fall back with them, through Berlancourt to Guiscard. 9th Royal Irish Fusiliers providing the rearguard.
Continuing to withdraw towards the Canal du Nord alongside the French, the 36th (Ulster) Division passed through Sermaize and Fretoy-le-Chateau during the night, crossing the Canal du Nord to take up positions in a new reserve line between Bouchoir and Guerbigny around 06.00am on 26th March. 9th Royal Irish Fusiliers arriving at Erches, in the centre of the line, around 11.00am.

Location: Erches. German victory. With the German Operation Michael advance continuing on 26th March, Third Army and Fifth Army were instructed to hold a line between Bray and Rosieres-en-Santerre ‘at all costs’.
The loss of Bray by Third Army placed enormous strain on Fifth Army especially on XIX Corps who were now exposed to attacks from the north, east and north-west. Although Rosieres was held, failures elsewhere saw the dismissal of the General Gough from the command of Fifth Army.
36th (Ulster) Division in XVIII Corps, Fifth Army, had withdrawn alongside French 62nd Division to a position between Bouchoir and Guerbigny during the morning of 26th March. Arranged with 107th Infantry Brigade on the left, 108th Infantry Brigade in the centre and 109th Infantry Brigade on the right, the infantry were reinforced by the Royal Engineer Field Companies.
By 13.00pm the German advance had reached the line and several attacks were fought off during the afternoon. However the German artillery arriving later in the day they sent up a heavy artillery bombardment of the positions, followed by a large-scale infantry attack at 20.00pm.
Breaking through at Erches, a number of senior officers were captured. Including the Chief of Staff, General Staff Officer (Grade 1) Lieutenant-Colonel C.O. Place, who was returning from a conference of senior officers when his car drove into a German patrol.
At dawn on 27th March the Germans attacked again. As the French on their right retreated, to save themselves from being trapped, 109th Infantry Brigade withdrew with them.
Unfortunately no message was received by 108th Infantry Brigade, who were themselves trapped in Erches. They battled on under overwhelming odds until around 11.00am, by which time they were virtually annihilated and the last few survivors were finally overrun.
It has been said that only one officer and 19 other ranks came away alive. What was left of 107th Infantry Brigade and 109th Infantry Brigade continued to fight on, 15th Royal Irish Rifles holding out near Bouchoir until around midday, before withdrawing towards Arvillers.
Here they joined with the remainder of 1st Royal Irish Rifles and 2nd Royal Irish Rifles, the total force of the three battalions now numbering only 3 officers and 60 other ranks. In Arvillers, this small force held the line on their own until they were finally relieved by the French on the morning of 28th March.
The 36th (Ulster) Division were one of the divisions mostly heavily affected by Operation Michael, during which they suffered a total loss of 7252 casualties.
: Villeselve. German victory. 36th (Ulster) Division had retreated back from the River Somme on 23rd March to positions between Golancourt and Cugny.
109th Infantry Brigade attempting a counter-attack at Golancourt during the early hours of 24th March, the attack was foiled when the German troops arrived in their own attack. Fierce fighting continued throughout the morning as the Division withdrew to Villeselve where around midday they came under heavy artillery bombardment.
With the French on their right withdrawing during the afternoon the Division had no choice but to fall back with them, through Berlancourt to Guiscard. 9th Royal Irish Fusiliers providing the rearguard.
Continuing to withdraw towards the Canal du Nord alongside the French, the 36th (Ulster) Division passed through Sermaize and Fretoy-le-Chateau during the night, crossing the Canal du Nord to take up positions in a new reserve line between Bouchoir and Guerbigny around 06.00am on 26th March. 9th Royal Irish Fusiliers arriving at Erches, in the centre of the line, around 11.00am.

Location: Pick House. British defensive victory. Part of the German ‘Operation Georgette’ Spring Offensive aimed at Hazebrouck and Ypres.
Following two days of artillery bombardment on 9th April the German Sixth Army attacked the British First Army on a line between Armentieres and Festubert. Much of the line was held by a demoralised Portuguese Corps who were due to be relived and they were unable to combat the new German ‘stormtrooper’ tactics.
The Germans broke through on nearly 10 miles (15km) of front and advanced up to 5 miles (8km) on the first day, reaching Estaires on the River Lys. Having suffered a high number of casualties during the German ‘Operation Michael’ Spring Offensive, 36th (Ulster) Division had been taken out of the line for a period of rest and to train its new reinforcements.
In billets around Herzeele when Operation Georgette began on 9th April, 108th Infantry Brigade were transferred to reinforce 19th Division, in IX Corps, Second Army, holding a position around Messines (Mesen). Holding a reserve position near Kemmel Corner on 10th April, during the morning of 11th April they moved forward to assist 57th Infantry Brigade who were under pressure at Messines.
1st Royal Irish Fusiliers moving to positions at Pick House, 9th Royal Irish Fusiliers to the west of Messines and 12th Royal Irish Rifles outside Wulverghem as 19th Division pulled back during the night of 11th-12th April. By 11th April the British situation was desperate and it was on this day that Haig issued his famous ‘Backs to the Wall’ order.
Private R. Morrow, 1st Royal Irish Fusiliers, was awarded the Victoria Cross for his actions on 12th April.

Location: Wulverghem (Wulvergem). British defensive actions in German victory. As Operation Georgette continued the German Army pushed forward towards Hazebrouck capturing Bailleul after two days of stiff resistance.
The British retreated to the Ravelsburg Heights and Kemmel. On 10th April, 108th Infantry Brigade of 36th (Ulster) Division had been attached to 19th Division in IX Corps, Second Army to defend the area around Messines (Mesen).
On 12th April the Brigade was holding a position east of Wulverghem (Wulvergem), from the Messines to Wulvergem road to the Douve, when at 18.40pm they were attacked by a strong German force. The situation was desperate for a time, the attackers breaking through 9th Royal Irish Fusiliers before 12th Royal Irish Rifles staged a counter-attack to force them back and recover the position, but by 20.25pm the line had been restored and the attackers withdrawn.
Small-scale attacks continued the following day, all of which were dispersed by Lewis-guns, rifle fire and grenades. During the night of 13th -14th April, 1st Royal Irish Fusiliers and 9th Royal Irish Fusiliers were withdrawn from the line for rest and reorganisation near Kemmel.
However they had barely reached camp before, around midday on 14th April, they were ordered forward again. 1st Royal Irish Fusiliers in support of 12th Royal Irish Rifles north of Wuvergem, 9th Royal Irish Fusiliers to the Kemmel defences.
During the early morning of 15th April, the positions held by 1st Royal Irish Fusiliers and 12th Royal Irish Rifles came under a heavy artillery and trench mortar bombardment, which was followed by a large-scale infantry attack. The attack broke through the front of 12th Royal Irish Rifles and when a counter-attack by the battalion and 1st Royal Irish Fusiliers was unable to restore it, the two battalions withdrew back to a new position closer to Kemmel.

Location: Kemmelberg (Mont Kemmel). Allied victory. On 16th April 1918, Meteren and Wytschaete (Wijtschate) fell and the Germans came to the foot of the Kemmelberg (Kemmel Hill).
At dawn on 17th April they launched a thunderous assault on the Belgian Army, aided by several British Divisions, who were holding the area, which for a time looked as though it would break through. With determined resistance the line held before four French Divisions arrived to reinforce the defenders.
During the battle, 108th Infantry Brigade of 36th (Ulster) Division was attached to 19th Division in IX Corps, Second Army. In the Kemmel defences on 15th April, during the early morning of 16th April the three battalions of the Brigade were withdrawn into reserve positions at Clydesdale Camp, north of the Kemmelberg (Mont Kemmel).
Here they were heavily shelled during the day, the Brigade Headquarters being forced to relocate and the men forced to seek shelter in nearby ditches. On 17th April the Brigade was instructed to form a composite battalion to reinforce the defences on Mont Kemmel.
The Battalion being formed from men of 1st Royal Irish Fusiliers, 9th Royal Irish Fusiliers and a Lewis-gun detachment of 12th Royal Irish Rifles. On the way to their position they were again caught under an artillery bombardment, loosing nearly 100 casualties.
The survivors continuing on to a hold a position on the western side of the Kemmelberg throughout 18th April. They were relieved here by a French unit later that day.

Location: Shoddy Farm. Allied victory. On 18th July the Allied Commander-in-Chief, Marshal Foch, had launched his joint French-American counter-offensive on the Marne, intended to drive the German’s back from Paris.
At the same time, other small-scale operations took place in other sectors of the line. In British Second Army, holding the sector around Ypres, 9th Division recaptured Meteren on 19th April, 36th (Ulster) Division in II Corps holding the sector north of Bailleul immediately to their right.
On 22nd July, 9th Royal Irish Fusiliers raided Shoddy Farm, near La Bourse and the same position again on 11th August. 15th Royal Irish Rifles capturing Mural Farm and Wirral Farm on 21st August, a counter-attack was fought off that evening.
108th Infantry Brigade, 1st Royal Irish Fusiliers on the left and 9th Royal Irish Fusiliers on the right, staged a major attack on 24th August to advance the line towards Bailleul. Continuing the attacks in September, the Division moved forward again towards Stinking Farm on 4th September as 29th Division captured Hill 63.
1st Royal Irish Fusiliers and 9th Royal Irish Fusiliers making advances at St Quentin Cabaret, near Wulverghem (Wulvergem) on 5th September.

Location: Terhand. During August 1918, the Allied advances in France to drive the German Army back to the Hindenburg Line had put pressure on the remaining German forces all along the Western Front. To take advantage of this the Allied Commander, Marshal Foch, developed a strategy, known as the Grand Offensive, in which attacks would be made on the German lines over as wide a front as possible.
In the north, 12 Belgian Divisions, 6 Divisions of French 6th Army and 10 Divisions of British Second Army, making up the Groupe d’Armees des Flandres (GAF) prepared to break out of the Ypres salient and form the northern pincer of an offensive towards Liege. Attacking at 05.30am on 28th September without a preliminary bombardment to maintain the element of surprise, into ground held by only 5 German Divisions, by the end of the day the Allies had advanced over 6 miles (9.6 km), recapturing much of the ground west of Passchendaele that had been abandoned in early 1918.
Despite heavy rain making the going difficult the advance continued until 2nd October, when German reinforcements arrived and the Allies outran their supplies. In the attack of 28th September, 36th (Ulster) Division in II Corps, Second Army were the Corps Reserve as 9th Division and 29th Division attacked along the Menin Road, east of Ypres, capturing Geluveld and Kruiseke.
36th (Ulster) Division moving forwards alongside the other two divisions the following morning, at 09.30am, 109th Infantry Brigade advanced on Terhand, 9th Royal Inniskilling Fusiliers on the left, 2nd Royal Inniskilling Fusiliers on the right and 1st Royal Inniskilling Fusiliers in support. The attack made rapid progress, 2nd Royal Inniskilling Fusiliers clearing a machine-gun post which held them up for a time, the village was cleared by 15.45pm.
9th Royal Inniskilling Fusiliers moving on towards Dadizeele. 108th Infantry Brigade passing through 109th Infantry Brigade during the night, they continued the advance from Vijfweben towards Moorsele the following morning, 12th Royal Irish Rifles on the left, 9th Royal Irish Fusiliers on the right, 1st Royal Irish Fusiliers in support.
Coming under heavy fire from positions in Methuen Wood and Leadenhall Copse, 2nd Royal Irish Rifles came up in support during evening of 30th September-1st October. 1st Royal Irish Fusiliers and 2nd Royal Irish Rifles continuing the attack the following morning, 1st Royal Irish Fusiliers having a hard fight to capture and hold Hill 41, 9th Royal Irish Fusiliers moving forwards to assist them, as 2nd Royal Irish Fusiliers cleared several strong points, including Stansfield House.
Lance Corporal E. Seaman, 2nd Royal Inniskilling Fusiliers, was awarded a posthumous Victoria Cross for his actions on 28th September.

Location: Moorslede. Following their success in the Battle of Ypres, the 12 Belgian Divisions, 6 Divisions of French 6th Army and 10 Divisions of British Second Army who made up the Groupe d’Armees des Flandres (GAF) had been required to put their advance on hold due to supply problems and bad weather. On 14th October they were ready to continue.
By the evening the Belgians had reached Iseghem and Cortemarck, the French had reached Roulers and the British had captured Moorslede. The British cleared the north bank of the River Lys up to Harelbeke the following day as the French took Roulers.
Thurout, Ostend and Douai were captured on 17th October, Bruges, Zeebrugge and Courtrai on 19th October and the Dutch border reached the following day. The German Army was forced to retreat further south and the GAF and British Fifth Army pursued it to, and then across, the River Schelde.
On the right of the attack, British Second Army advanced with II Corps, XIX Corps and X Corps. On the right of the II Corps attack, 36th (Ulster) Division moved off from positions near the Viijfwegen to Zuidhoek road at 05.35am.
109th Infantry Brigade on the left, 1st Royal Inniskilling Fusiliers the lead battalion, 107th Infantry Brigade on the right, 15th Royal Irish Rifles the lead battalion, 108th Infantry Brigade in support. Thick fog and smoke made keeping direction and keeping up with the creeping barrage difficult, however by 08.00am, 15th Royal Irish Rifles were into the outskirts of Moorslede and 1st Royal Inniskilling Fusiliers at Rolleghem-Cappelle (Rollegem-Kapelle).
15th Royal Irish Rifles capturing Moorslede, 2nd Irish Rifles moved through to continue the advance, 2nd Royal Inniskilling Fusiliers passing through 1st Royal Inniskilling Fusiliers. 2nd Royal Irish Rifles reaching the outskirts of Gullegem (Gulleghem), where they were forced to halt to wait for the artillery as resistance increased.

Renewing the attack at 09.00am on 15th October, 2nd Royal Inniskilling Fusiliers attacking from the north, 2nd Royal Irish Rifles from the south, the town was cleared by 09.30am and the advance resumed towards the River Lys. By 14.00pm, 9th Royal Inniskilling Fusiliers had passed through Heule to reach the Courtrai-Ingelmunster Railway, west of Courtrai (Kortrijk).
1st Royal Irish Rifles reaching them by 19.00pm. 108th Infantry Brigade passing through during the night of 15th-16th October, 12th Royal Irish Rifles moved into Courtrai as the Germans retreated across the River Lys.
122nd Field Company, Royal Engineers erecting a pontoon bridge, advance troops were able to establish a bridgehead on the south bank before the bridge was destroyed by German artillery. The party withdrawing during the evening as the Division was relieved.

the Final Advance In Flanders – Ooteghem – 25 October 1918